Some intitial questions to get started
- Time frame. Useful for investigation; was it yesterday, a week ago or a month? We use this for timestamps, event logs, SIEM.
- What issues are experienced?
- Position within the organisation? Could it be a phish (sales, HR, finance) - check emails.
2 DFIR cases rarely use the same tactics, techniques and procedures (TTP’s) & threat actor activity can always change the artefact, however the following are some technical areas to start examining.
Event Logs
These are locate at C:\Windows\System32\winevt\logs
Some log events found in Security.evtx that are of interest:
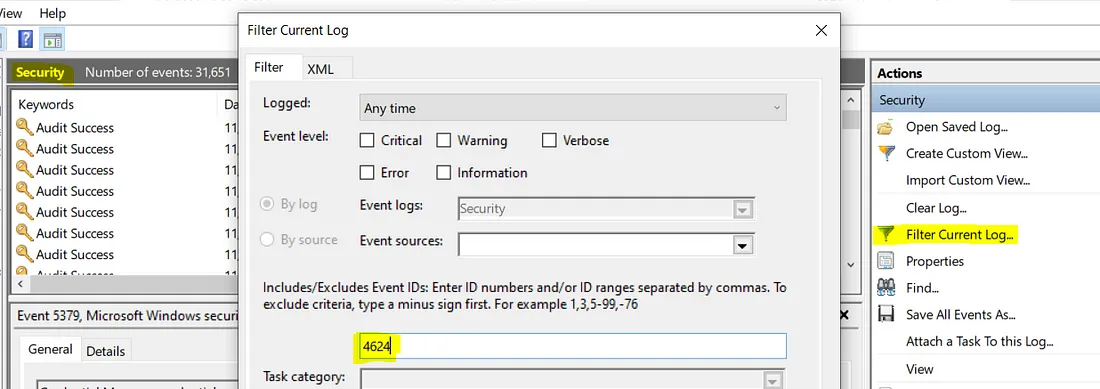
- 4624/4634 — successful logon and logoff; there’s a field here called LogonID which you can use to track how long an attacker was logged on for. You see what process was used, logon type, and if you’re lucky, the workstation name and IP address from where they initiated the logon.
- 4672 — an account logon with superuser rights; they’ve got admin rights. If they used explicit credentials, the logon EID would be 4648.
- 4720 — an account was created; it’s not uncommon for attackers to do this to maintain persistence
- 4625 — failed logon attempt; if you see multiples of these one after the other, someone’s trying to brute force their way in
- 1102 (Security), 104 (System) — audit log was cleared; attackers small and large do this to cover their tracks.
Log events in OAlerts.evtx (if enabled) show whenever a user opens a MS Office file. The pop-ups from these files are also logged, useful to see if a user has enabled macros or not. The filename is also logged and therefore a great way to see if the user was phished.
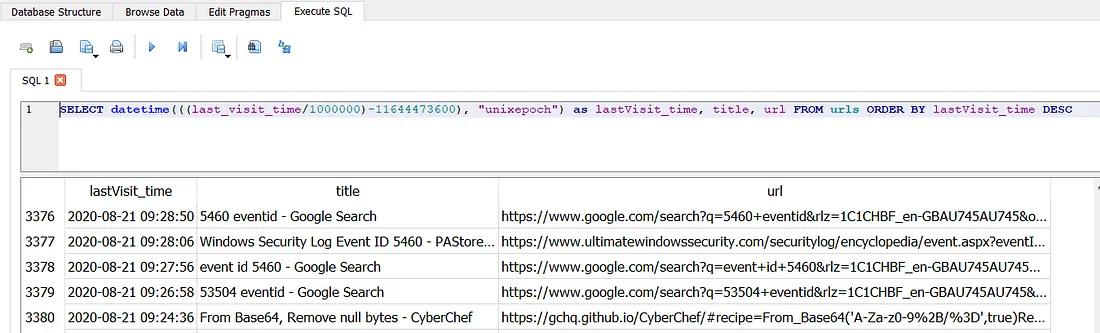
Below we can see an SQL command was run on opening of the document

Browser History
Google Chrome
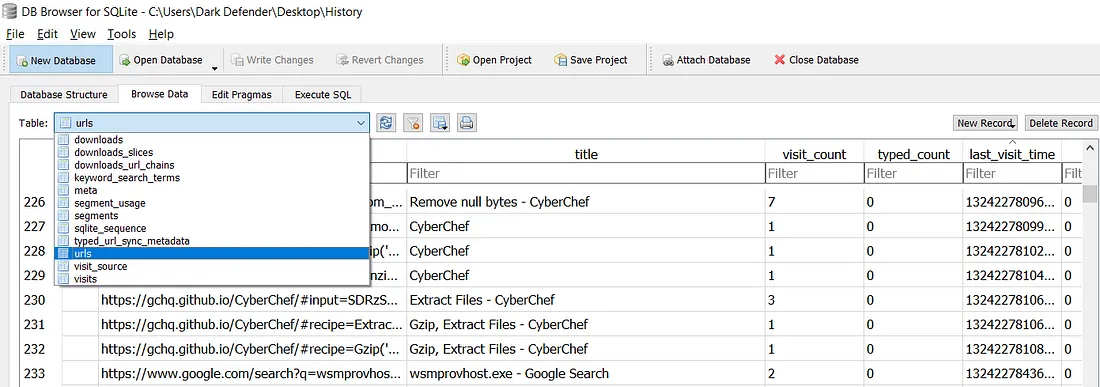
Profile data is located in C:\Users{Username}\AppData\Google\Chrome\User Data\Default. This directory contains all of the user’s information as SQLite3 databases (History, Cookies, Login Data, Login Data Journal for the most useful ones). We can use the free DB Browser to view it. As you can see below there are a number of tables, perhaps the most useful are; urls, downloads & keyword_search_terms
Firefox
Profiles are located in C:\Users{Username}\Application Data\Mozilla\Firefox\Profiles. Each profile contains a places.sqlite file keeping tracks of all of the user’s bookmarks, downloads and history. This is the same type of file as Chrome therefore the same DB Browser can be used.
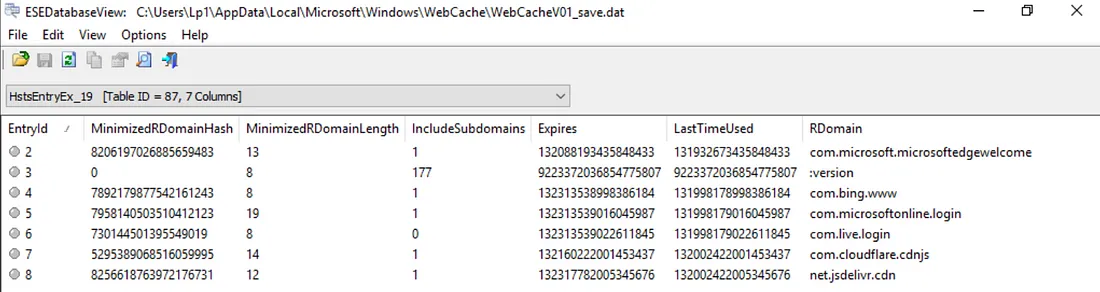
Edge
Profile history is located in C:\Users{Username}\AppData\Microsoft\Windows\WebCache. In this directory is an Extensible Storage Engine (ESE) database file containing Internet Explorer and Edge’s browsing history named WebCacheV01.dat. This is an ESE database therefore can only be opened by ESE Database View (closed-source, developped by NirSoft only on Windows) or OSForensics.
Scheduled Tasks
Stored in C:\Windows\System32\Tasks can also be checked in Event Logs as EID 4698 (Scheduled Task created).
Persistence Mechanisms
First place to check is the Registry Hive C:\Windows\System32\config\SOFTWARE and the following keys as they will run on boot (RunOnce deletes on first run):
- SOFTWARE\Microsoft\Windows\CurrentVersion\Run
- SOFTWARE\Microsoft\Windows\CurrentVersion\RunOnce
Registry Viewer provides a nice GUI for this.
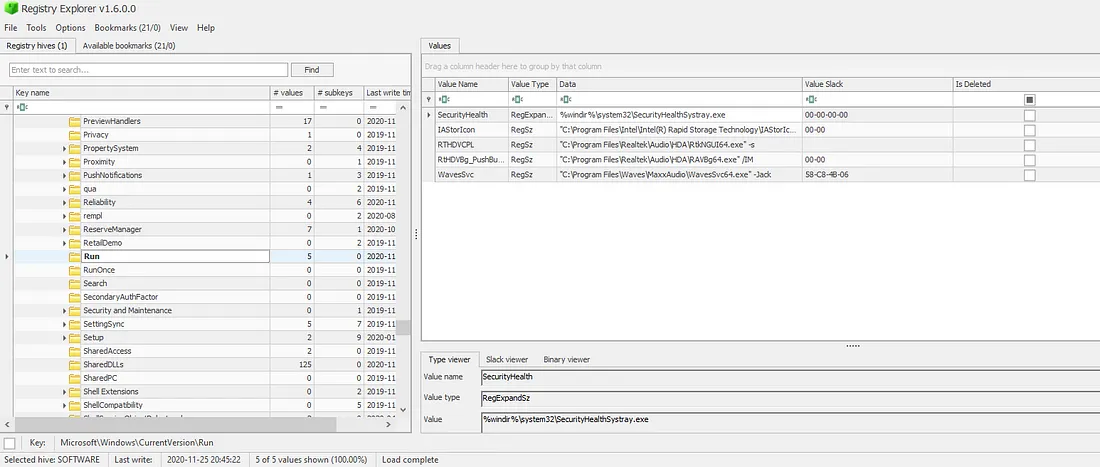
It will also show you any deleted keys — useful if the attacker deleted this persistence mechanism because they completed their objective and wanted to clean up!
Other keys in the SOFTWARE hive include:
- Microsoft\Windows NT\CurrentVersion\Winlogon\Userinit - this should be set to C:\Windows\system32\userinit.exe
- Microsoft\Windows NT\CurrentVersion\Winlogon\Shell - this should have the vale explorer.exe
- Microsoft\Windows\CurrentVersion\Explorer\User Shell Folders - anything in a user’s Start Menu will auto-run
Keys in the SYSTEM hive:
- CurrentControlSet/Services - are installed services on the machine
This will no doubt be a long list, which can be sorted by date of creation though probably better looking at the security event log for EID 4697 “a service was installed in the system”.
Recently Opened Files
Generally when a phishing email is successful, you’ll typically see
email -> document -> web link or macro -> powershell -> cmd (command line execution)
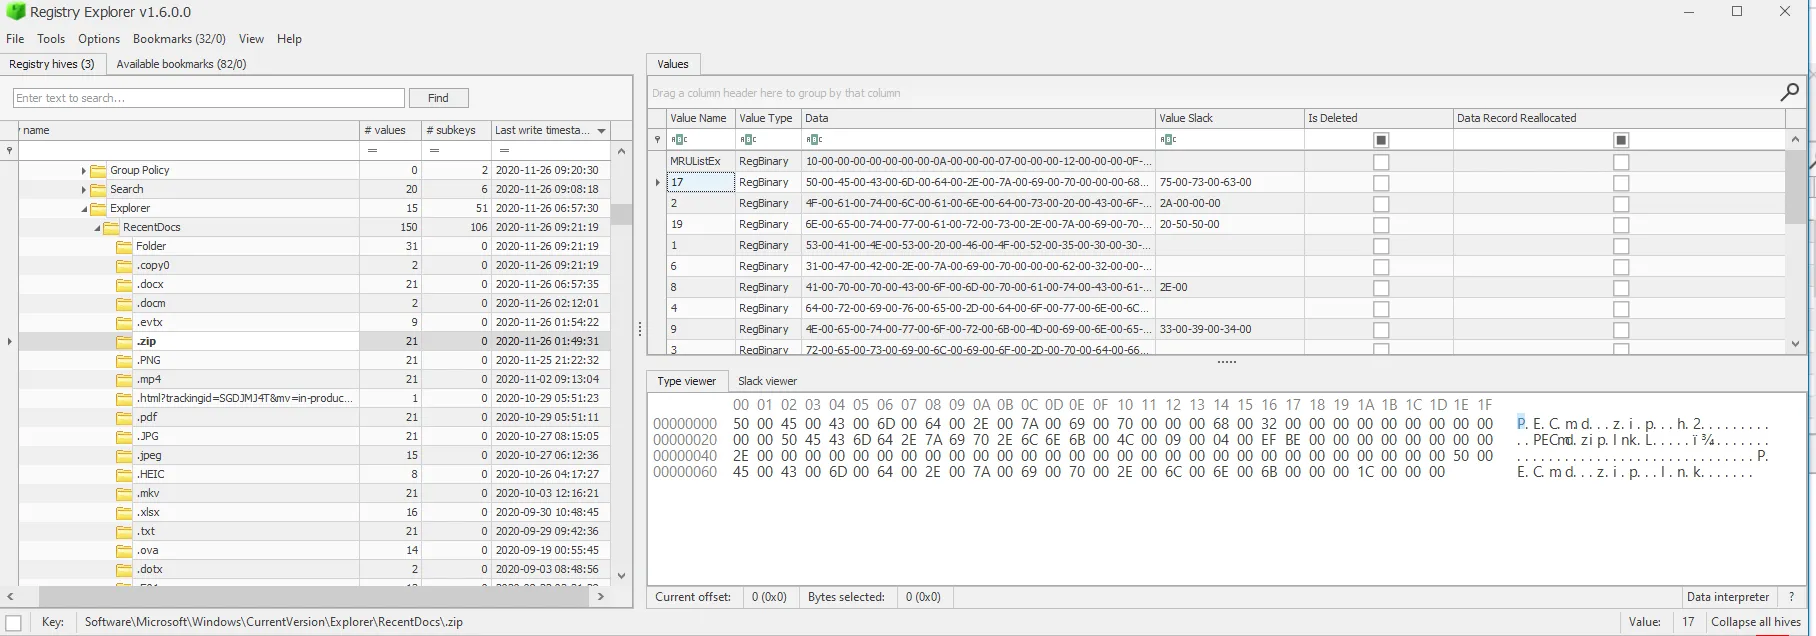
Each user on a laptop will have their own NTUSER.DAT file, which is their own personal history of activity. It’s a hidden and locked file in *C:\Users\username*, which means you will need a tool like Registry Explorer to be able to read and analyse it.
NTUSER.DAT\Software\Microsoft\Windows\CurrentVersion\Explorer\RunMRU MRU (Most Recently Used), as the name suggests, shows the most recently used programs.
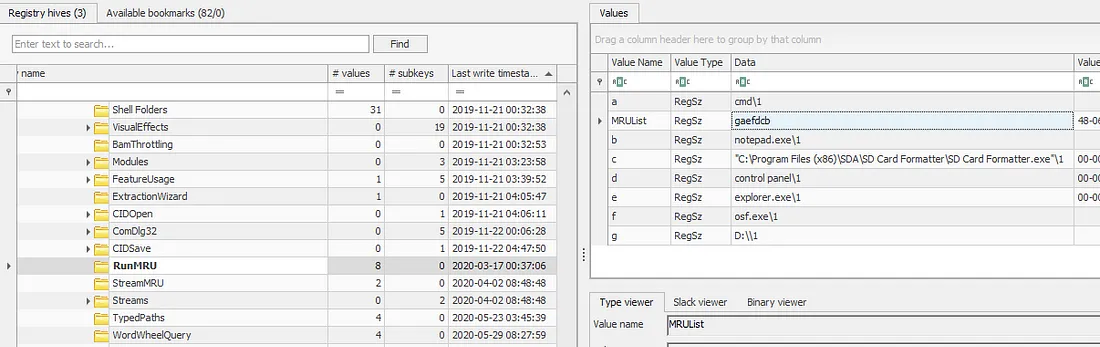
NTUSER.DAT\Software\Microsoft\Windows\CurrentVersion\Explorer\RecentDocs any file that a user opens will be captured here in the same MRUList as we saw in RunMRU. It’s a sure-fire way of determining what was opened — super important in the case of phishing campaigns or potentially unwanted program downloads as they usually name malware something stupid like dog.pdf.bat.
If those artefacts don’t show anything malicious, there is a final evidence of execution piece: Prefetch. These files are stored in C:\Windows\Prefetch as .pf files. Whenever a program is executed, it will create a .pf file for it which stores:
- Name and full path of the executable
- The first and last time it executed, the number of times it has been executed, and the files/handles that were used by the program at the time of execution
- The last 8 timestamps of when it was executed.
We can use Eric Zimmerman’s PECmd. This program also tags any malicious files or handles the program referenced in red.

Something to note: you may see multiple prefetch files for the same program. This is because prefetch files are created for each different path that the program was executed from. So, if I ran Google Chrome from my Desktop and the Downloads folder, I’ll have two prefetch files. This is why we see a hash-like value after ‘CHROME.EXE-’ below.
Resources Used
https://www.secjuice.com/how-to-handle-an-intrusion-on-a-windows-system/ https://darkdefender.medium.com/can-you-check-if-my-computers-been-hacked-f18e8f971aed
]]>